
The Top 3 Seed Starting Problems - and how to avoid them!
I have learned a lot of hard lessons through the years about how to start seeds properly. I can't even tell you how many failed seed starting projects I've tried. Before living on the farm, we were renting a small townhouse with no yard. I remember attempting to start seeds for pots with no real plan in place - I had no idea when to start them or how to make sure they were successful.
Some of the seeds legitimately germinated but honestly - I think I got lucky.
There were a couple of other times I tried seed starting simply by putting the seeds close to a window and that definitely didn't work. All of a sudden I had tall, skinny, leggy tomato seedlings. What went wrong??
I have good news for you! You can learn from my seed starting mistakes so you can get as much as possible from your own seed starting set up!
1. "My seedlings are tall but really weak, what did I do wrong?"
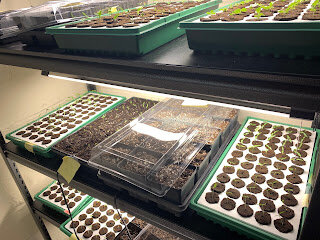
This is your seedlings crying for light. Light is incredibly important in starting seeds, even a south facing window often won't provide enough light for seeds to flourish and grow into strong seedlings. My LED shop lights were about $10 each, and you can easily set one up temporarily over your seed starting trays. They will need 16 hours per day under their grow lights to grow strong.
2. "My seedlings are wilted and I think some have died, help!"
This could be insufficient watering - the soil is likely either very, very dry - or very, very wet. Seedlings as they are getting established are quite particular with water. I typically water mine from the bottom until they sprout. I also mist them as needed with a spray bottle from the top to ensure even moisture throughout. If the soil is a light brown, it is too dry - mist from the top until the soil is a dark brown color.
A lot of seed starting mixtures soak up quite a bit of water - but you don't want to overwater, otherwise they will not grow properly. A mister bottle is a great compromise. Once the seedlings are established and a few inches tall, you can start to water from the top with a watering can that has a small water spout (a large stream of water can crush delicate seedlings).
If you feel lost with where to even begin with seed starting supplies, I would recommend starting with a seed starting tray and the plugs they come with. They can be found at any garden store.
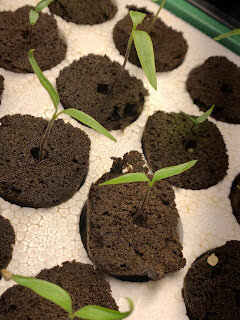
Our peppers are doing very nicely!
Peppers generally take longer to grow, so they are one of our first seeds we start.
3. "None of my seeds germinated, what is the problem?"
There could be a couple of problems here. If you are using older seeds, check the germination rate before planting. All you do is put a few on a damp paper towel and put in a plastic Ziploc bag and wait 2 weeks. If they have sprouted they are still good. If they haven't, your seeds are not going to germinate in the soil either.
An alternative challenge can be heat. Seeds - especially heat loving plants such as tomatoes and peppers - are going to need soil that is hot enough for them to germinate. If your seed starting area is cool - like mine, which is an unfinished basement, here are a couple options. You can try seed starting heat mats which can be found on seed supplier websites or at garden stores, or you can try putting a small space heater in the area that you are starting seeds. This is more important during the germination process to get the growing process started.
Have other seed starting questions or problems? Be sure to send them my way either with a comment below or an email! I would be more than happy to talk seed starting with you!